Once your Necromancer reaches level 50, you will be in a prime position to pick and work towards your Build. Keep in mind that your Build will not only define your gameplay going forward, but also your optimal armor and weapons.
Below you can find some of the best Necromancer Builds for Diablo 4.
Bone Spirit
This Build lets you fulfill your dream of commanding the undead, by raising an army that will destroy enemies before they can bring you any harm. As per its name, the build primarily revolves around the use of Bone Spirit.

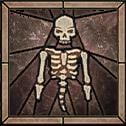
Minion
This Build allows you to fulfill your dream of commanding the undead, by raising an army that will destroy enemies before they can bring you harm. Damage from this Build will primarily rely on the Minions you summon with Raise Skeleton and Golem.
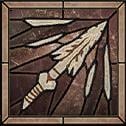
Bone Spear
A great self sustaining Build that allows for constant crits and an endless supply of Essence, all while keeping a safe distance from your enemies. Damage from this Build primarily revolves around Bone Spear.
Resources and Links
Dexerto
Necromancer Best Builds